How I Frame My Photos for Instagram
A lot of people ask me how I frame my photos for Instagram, so I thought I’d share my step-by-step process and my frame template from last year.
Step 1: Import RAW Files into Lightroom

After shooting, I drop my RAW files into Lightroom, my go-to for editing and bringing out the vibes I want in my photos.
Step 2: Edit the Photos

Next, I fine-tune the photo to match my artistic vision. I play with the contrast, colors, clarity, highlights, and shadows, ensuring every detail pops just the way I imagined.
Step 3: Export to Apple Photos

Once I’m happy with the edits, I export the finished photo to Apple Photos. This app serves as my repository for edited images, making them easily accessible across all my devices.
Step 4: Import Into My Photoshop Template

The next step is where the fun happens: framing the photo. I have a custom Photoshop template that includes:
A frame
A text box for the EXIF data
A placeholder rectangle for the photo (Clip Me)
I import the edited image into this template to start framing.
Step 5: Scale and Clip the Photo
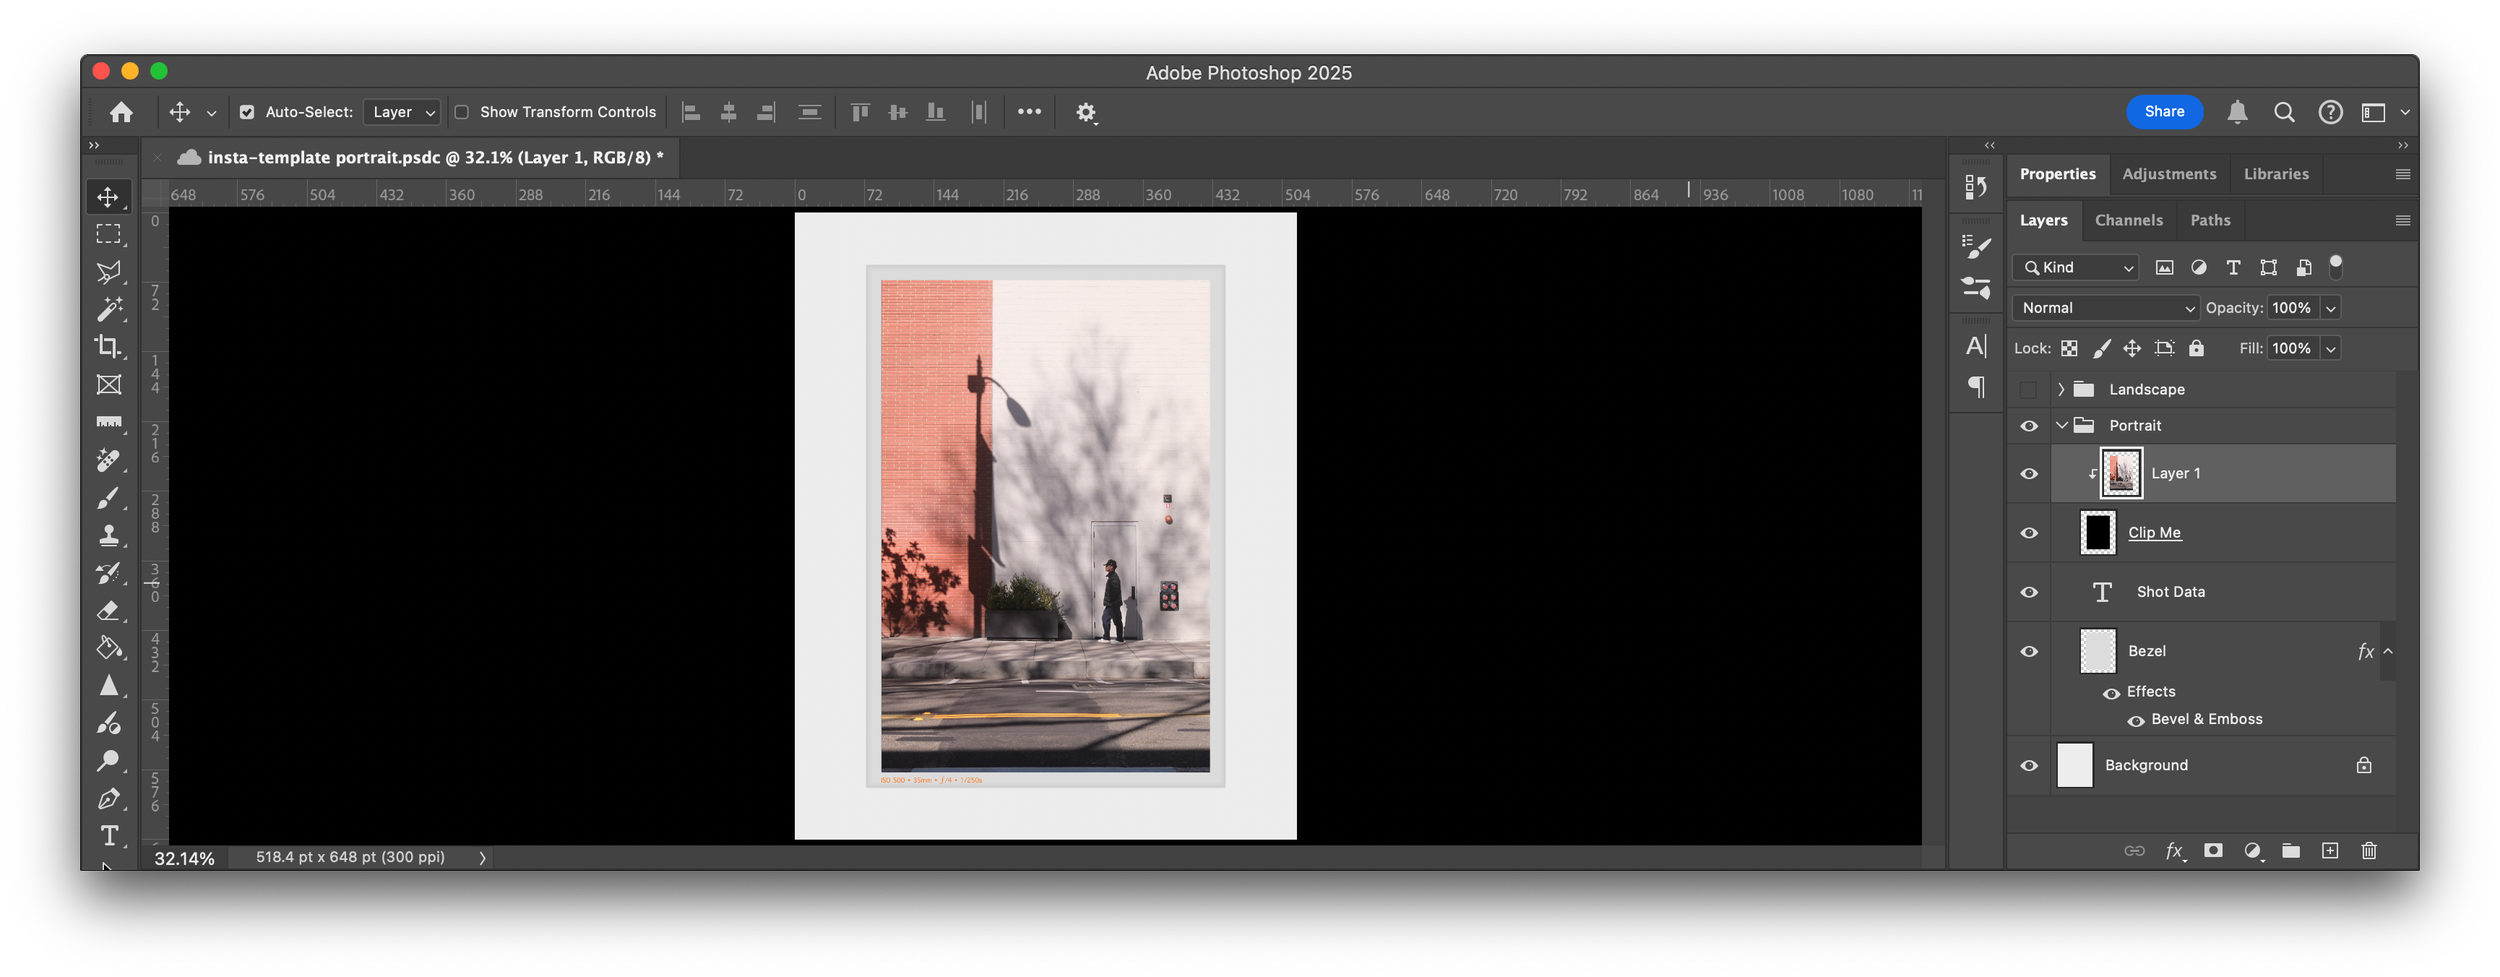
In Photoshop, I scale the edited photo to align it closely with the placeholder rectangle. Using a clipping mask, I ensure the image fits perfectly into the frame. This step gives my photos their clean, professional presentation.
Step 6: Add EXIF Data
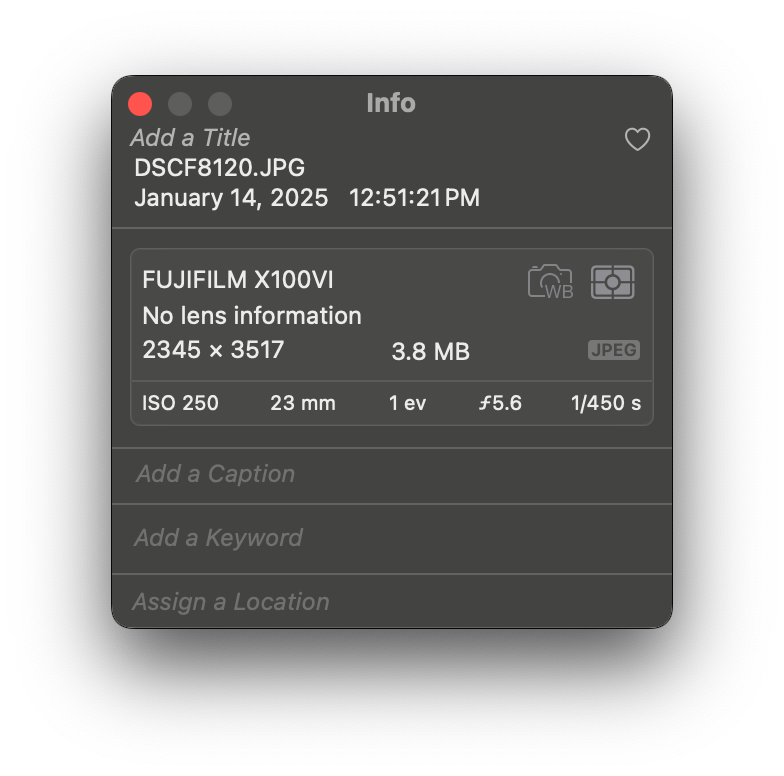
I check the EXIF data in Apple Photos and type it into my Photoshop template by hand. This data often includes:
Focal Length / Lens Info
Aperture
Shutter speed
ISO
This adds a layer of depth and context for viewers who want to understand the technical side of the shot. More importantly it serves as reminder for me as to what my settings were for shots that I really like. Something I learned about myself last year through this process is how much I love the 35mm Focal Length, I deviate rarely from it.
Step 7: Export the Framed Photo

Once everything is in place, I export the completed image from Photoshop back to Apple Photos. At this point, the photo is fully framed, complete with the EXIF data, and ready to be shared on Instagram.
(Why does my exported image say 35mm if the EXIF data says 23mm? 35mm is the full frame equivalent, because the X100VI is a crop sensor, you have to multiply the 23mm by 1.5X to get the full frame focal length )
Why I Frame My Photos This Way
This whole process helps keep my feed looking clean and consistent, plus sharing the EXIF data is my way of giving back to other photographers out there.
Got questions about my workflow or your own framing tips to share? Hit me up in the comments or on IG—always happy to chat! Cheers!